Friday, April 12, 2024

Twister Quilt

I love making Twister quilts! I have made several in the past. I usually use the 5" size Twister Tool to cut the Twister Pinwheels, but this time I used the 6.5" size and I like the larger pinwheel effect. I may try doing the next Twister with even larger blocks.

This quilt measures 36" x 36". I backed it in a bright yellow flannel. I grabbed all the pieces of fabric scraps that I had that were large enough to put into this quilt. I put it in the gift shop to sell it, so we'll see what happens. If it doesn't sell then it will be donated to Project Linus. That is always a great option for me to donate something that doesn't sell and I would say more than half of what I take there doesn't sell for whatever reason, I really don't know? I price them about or even cheaper than someone could make their own quilt so that is sells. It is easier to try sell at the giftshop than to sell online, which for me is much harder to do. I want to spend my time sewing and creating, rather than promoting myself all over the internet! 😜The time doing that takes away the joy and the time that I have to create and sew. Okay enough of that and on with the Twister Quilt!


Closeup
I used a Serpentine stitch to quilt in a diagonal grid.

another closeup

Flannel backing showing the Serpentine quilting stitches
Soft yellow flannel backing showing the Serpentine stitching.
Let's do the Twist!😁

Pin It Now!

Tuesday, April 9, 2024

Sew Powerful Purse #62 (2024) for a Special Girl

Sew Powerful sent out their newsletter and they had a small fundraiser that 20 people could join in doing. The idea was to make a purse and mail it to one of the women who is going on the trip to Zambia with some other people in May and she would hand deliver your purse and get a photograph taken of the girl with the purse that you made. There was a donation fee to be paid too, of course. I jumped on this as soon as I read it! I didn't know if I would ever be able to make the trip to Zambia and hand deliver several of my purses to girls, so this was the next best thing! I am so excited to see the girl who receives my purse.

I wanted this purse to be special. I had purchased several canvas prints last year and made one flap, but I couldn't find it! I looked everywhere too. Well it will turn up one day and I will finish making that purse. So in the meanwhile, I grabbed another print and made this flap and completed the purse.

I was at my quilt group last Thursday and won the nametag drawing (again)! That's twice this year I have won. I hadn't won anything in several years past. I received 2 fat quarters of fabric, some sock monkey buttons, a spool of metallic pink thread and a magnetic pin cup. Yay!!! So I used the fat quarter to make the exterior and the other one for the main lining of this purse, but had to use a fabric I had for the flap lining as the fat quarter wasn't large enough to cut all the lining pieces.

I sewed ribbons around the canvas print to bring it up to flap size, stitching each ribbon in place with a decorative stitch using a variegated thread, then I added some buttons, a handmade label, and stitched a decorative stitch down the center of the webbing too.

The flap with the added sewn ribbons around the flap. The canvas print was actually taller with the full dress showing, so I had to cut the height down to fit the height of the flap.

Showing the entire flap and part of the back of the purse
Here is the full view of the flap, since about 2-inches folds to the back side and you couldn't see those other ribbons.

Back fo the purse with a slip pokcet
Back of the purse I added a slip pocket and I sewed in 2 strips of the lining fabric to make the pocket wide enough.

Showing front of purse with flap lining
Front of the purse shows the pocket under the flap and the flap lining.

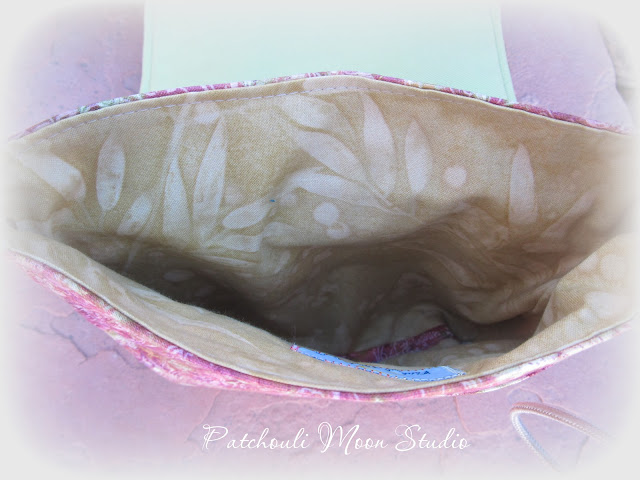
Peeking inside purse to show lining fabric
Peeking inside the purse to show the lining fabric.

I have several more canvas prints of women that are all different, that I can create more purses for more girls in the future. But I better get the purses I have cut out in kits finished up first. Then I can cut more kits to have ready to sew.

I should have a photo of the girl with this purse sometime in June, so be sure and come back to see it. 

Happy Purse Sewing!


Pin It Now!

Monday, April 8, 2024

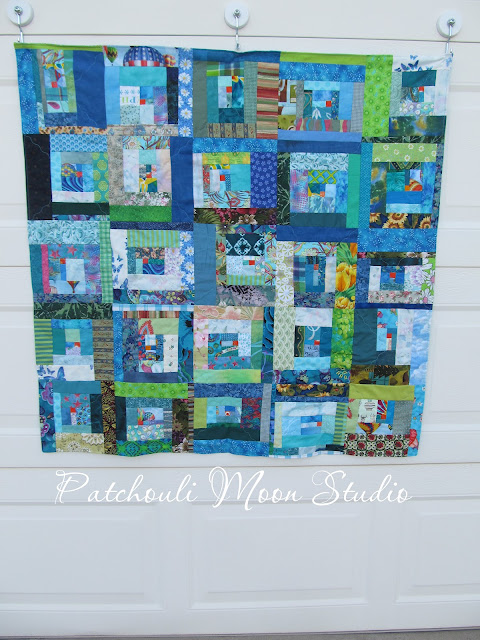
4 Scrappy Free Form Log Cabin Style Quilts for Project Linus Donation

Hello my crafty, sewing friends. Several months ago I got the idea to make a free from scrappy quilt using my turquoise scraps and a tiny orange center for each block that I made. Well, I didn't plan it out very well as I just kept sewing scraps and I had so many blocks started, but very few that were squared to the 8.5" square size I wanted, so I had to add blue scraps and green scraps as well as the turquoise I started with, 😜.  Then when sewing the blocks together, I didn't want huge quilts, so I made 3 square quilts at 40" x 40" and one that was a bit longer and a rectangle instead of square. I actually made 2 rectangle ones, but I will share that one another day, as I am going to see if I can sell that one first at a gift shop. If it doesn't sell, I will donate it too.

I love piecing scraps to make these free form log cabin style quilts. No rules, no mistakes, just sewing fun! They can be sewn with any width scrap (from 1" to about 3") and sewn in the Log Cabin style (sewing around and around in a clockwise fashion) or the Courthouse Steps style (sewing strips across from each other) or both ways in the same block. I choose where I want to sew the scrap based on the length of the scrap piece. Sometimes I don't have a long enough strip to sew on a certain side, so if it fits on a different side then that's where it gets sewn.

I backed all of these quilts using soft flannel. In fact, I didn't add any batting at all. I just sewed the backing and the top right side together, left an opening and turned them. I press them, topstitched all around, which closed the opening, and quilted to hold the 2 layers together in a Serpentine Stitch on the diagonal. The pieced top with the flannel backing was heavy enough as is without any batting and the quilt has more drape too. 

I like to add an appliqué animal or a flower on my scrappy quilts that get donated, but these were so busy, that when I auditioned a large appliqué by placing it on top, it got lost, so no appliqué for these quilts. I will have to choose a different light color to piece next time in order to add some appliqué to the quilts.

5 blocks across x 5 blocks down (8" finished blocks) makes this quilt 40" x 40".

Backing is flannel with Peace Signs
The flannel backing I used was Peace Signs. I love how soft the flannel makes a quilt more cuddly.

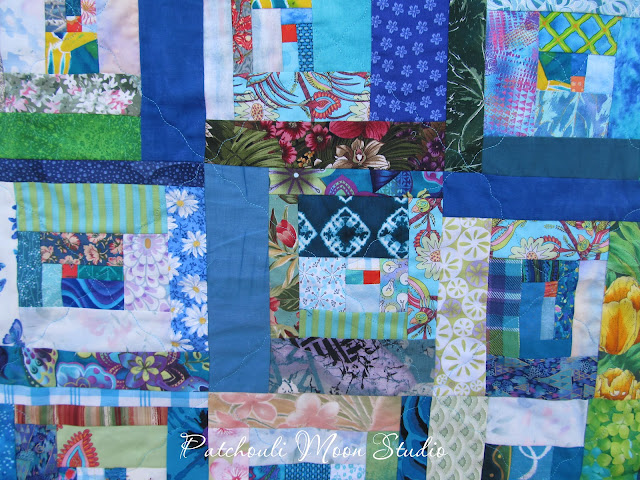
Close up
Closeup of a few blocks.

This is the rectangle shaped quilt as it has 5 blocks x 6 blocks, making it 40" x 48".

Close up
Close up look.

Royal blue flannel backing
Royal blue flannel backing.

Another 40" x 40" quilt.

Close up
There are a lot of fun scraps in these quilts. Sort of an "I Spy" quilt, making it fun for the child to find all sorts of things, like the ballerina pig above.

Close up
Another close up.

Royal blue flannel backing
This was also backed in royal blue flannel, but I needed to add a strip of the floral print flannel to make it big enough at the top.

40" x 40".

Close up
I spy a hot air balloon, butterflies & flowers.

Blue floral flannel backing
This flannel backing is the floral print.

Happy Scrappy sewing!


Pin It Now!

Wednesday, March 27, 2024

19 Scrappy Pieced Doll Quilts

Trying to use up the never-ending Pile O Scraps!!! Okay that is impossible to do! You end up with more scraps after cutting the backing fabric, and binding (if you use binding), and smaller scraps after using larger scraps, so the scraps keep on coming, lol! That's okay, because sometimes you need a mindless scrappy project to sew and sewing scrappy quilts, whether large or small is just satisfying. I do use up some scraps (even if it doesn't appear so) and making these doll quilts for a charitable cause is also something to feel good about as well. 

My quilt group makes doll quilts all year, anytime and we turn the doll quilts into the person who collects the doll quilts. Near Christmas time the doll quilts are given to a local woodworking group that we quilters partner with, who are busy all year making cute little wooden rocking doll beds. They give little girls a rocking doll bed with a fabric doll and a quilt. The woodworkers also make small wooden toys for the boys, but if they prefer a doll, they can have that instead and visa versa a girl could request a wooden toy instead. 

Periodically I make the doll quilts to use up all kinds of scraps I have. One year I made 75 doll quilts. I made 19 this time. I like to make the quilt 9" x 12", which is slightly larger than the suggested size of 8 1/2 x 11 (the size of a standard computer/typing paper). I have seen the quilts placed long way over the width of the doll bed, yet when sharing the doll quilts, most hold them up like a piece pf paper with the height being the long way, which to me never made any sense, so I make them like this and a bit larger, so the little girl can wrap her doll up in the quilt if she wants to.

I backed each one with flannel to make it soft and just sewed the quilt top and backing right-sides-together and left an opening to turn the quilt. I then topstitched all around and quilted it with a simple diagonal serpentine stitch from corner to corner. That is enough to hold it together. I did not add any batting as these have a bit more drape to them and batting would add a bit of stiffness (and cost). 

The pieced heart I had made awhile ago, so I appliquéd it on a piece of fabric and sewed more scraps around to make this doll quilt.

I used this backing for the quilt above and one other quilt.


Yellow flannel backing was used for a few of the quilts.


This flannel with stars was used as backing for a few quilts.


I used this flannel for a few backings.


This flannel I used for one backing.


This was not flannel, but used it as a backing. It was from a fat quarter I had won at my quilt group.

This flannel backing was used for one quilt. I quilted this one first and did straight line stitching and a bit more stitching, but then changed to the diagonal X serpentine stitching in the others as it was simpler and faster.


Pin It Now!
Related Posts Plugin for WordPress, Blogger...